A poolside patio isn’t just about aesthetics—it needs to be safe, slip-resistant, and built to last through splashes, sun, and seasonal shifts. If you’re planning to install pavers near your pool, it’s crucial to do it right from the ground up.
This guide will walk you through exactly how to lay pavers for a poolside area that stays beautiful and stable, without the risk of shifting, cracking, or water damage.
Why Poolside Paver Projects Need Extra Attention
Installing pavers near a pool involves more than your average patio project. Pool areas deal with:
-
Constant moisture
-
UV exposure
-
Heavy foot traffic
-
Chemical runoff (like chlorine or saltwater)
So, the materials, drainage plan, and installation method must all be dialed in. For more general guidance, check out our full tutorial on How to Lay Pavers and consider reaching out to the pros at Lakota Design Group for expert poolside solutions.

1. Choose Pool-Safe Pavers
Start with selecting the right paver type. You want materials that are:
-
Slip-resistant (textured finishes are a must)
-
Heat-reflective (lighter colors help reduce burn risk)
-
Salt and chlorine-resistant
Best options include:
-
Travertine
-
Tumbled concrete pavers
-
Natural stone (with sealed joints)
Avoid glazed or polished surfaces—these can be slippery when wet.
2. Design with Drainage in Mind
Water will always be present around a pool. Your goal is to control it, not fight it.
-
Slope the base away from the pool by at least 1/8 inch per foot
-
Include drainage channels or catch basins along the perimeter
-
Use permeable pavers or sand-filled joints for better absorption
Without proper drainage, standing water will lead to shifting, erosion, or algae buildup.
3. Excavate and Compact the Base
Remove 6–10 inches of soil depending on your paver and gravel depth.
-
Excavate 4 inches for gravel base
-
Add 1 inch of bedding sand
-
Account for paver thickness (typically 2–3 inches)
Compact the sub-base thoroughly using a plate compactor. Poolside patios experience tons of movement and moisture—so a stable foundation is everything.
4. Use a Stabilized Gravel Base
Regular gravel works, but for pool areas, consider stabilized road base or decomposed granite with a binder. These bases are more resistant to water flow and compaction over time.
-
Add gravel in 2-inch layers
-
Compact each layer thoroughly
-
Consider adding geotextile fabric underneath to prevent weeds and base shifting
5. Add Bedding Sand and Screed Evenly
Use washed concrete sand as a bedding layer.
-
Apply 1 inch over compacted gravel
-
Screed with a straight board or pipe system
-
Don’t compact this layer yet—let the pavers settle into it
This layer allows fine adjustments when placing your pavers and helps lock them in.
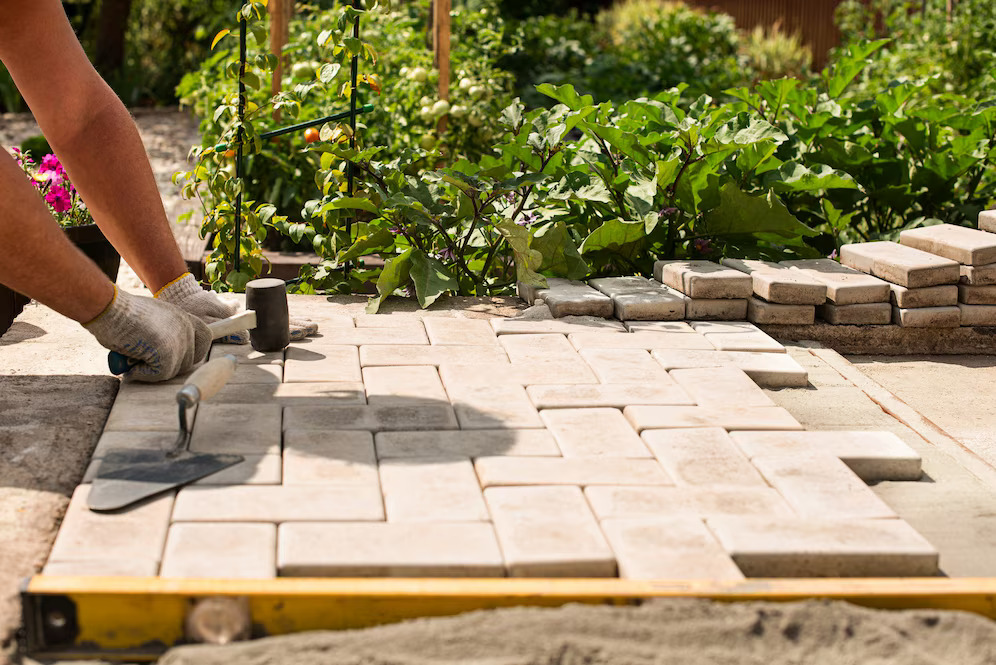
6. Lay Pavers Starting from the Pool Edge
Begin your paver layout along the pool coping (edge). This ensures a clean, aligned perimeter.
-
Use spacers or consistent joint gaps
-
Lay in your chosen pattern (herringbone, running bond, etc.)
-
Press each paver gently into place—don’t drag them through the sand
Check alignment every few rows using string lines or straight edges.
7. Install Edge Restraints
Edge restraints are essential to prevent the poolside patio from spreading over time.
-
Use concrete, plastic, or metal edging
-
Secure tightly with spikes or anchors
-
On curves, cut pavers cleanly to avoid gaps
Without restraints, shifting is inevitable—especially near water.
8. Sweep in Polymeric Sand
Once all pavers are laid and edge restraints are in place:
-
Sweep polymeric joint sand into all gaps
-
Compact the surface with a plate compactor (with a protective mat)
-
Mist lightly with water to activate the bonding agent
-
Let it cure for 24–48 hours (no foot traffic during this time)
This step locks everything in place and prevents weed growth or joint erosion.
9. Seal the Surface (Optional but Recommended)
A breathable paver sealer helps protect against:
-
Pool chemicals
-
UV damage
-
Water penetration
-
Mold and mildew
Apply with a roller or sprayer every 2–3 years. Look for sealers made specifically for pool decks to avoid slippery finishes.
10. Maintain Seasonally
To keep your poolside pavers in top shape:
-
Rinse frequently to remove pool chemicals
-
Check for loose or sunken pavers
-
Re-sand joints if erosion occurs
-
Reseal as needed
A few minutes of seasonal care goes a long way in preventing long-term repairs.
Conclusion
Laying pavers around a pool takes planning, the right materials, and careful execution—but the result is a durable, stylish, and safe patio that enhances your entire backyard experience. It’s not just about laying stone—it’s about creating a space that withstands the elements and invites relaxation.
For a complete guide to every paver project type, visit our tutorial on How to Lay Pavers. Or if you’d prefer help with your poolside project, reach out to Lakota Design Group for a custom consultation.


![[Help~DESk] Does QuickBooks Desktop Have 24 Hour Support?](https://bioneerslive.org/wp-content/uploads/2025/04/e64f8ccd-b6ce-4043-889e-a29d9ca62cc7J4yPQ8D-270x162.png)